In this post I will explain various ways to incorporate audio- and or video files in your APEX application.
With HTML5, generating a media player is really easy. In fact, <audio> and <video> are elements that can be interpreted by most up to date browsers. All you need to do to create a HTML5 media player is upload a file to your file server or image directory and refer to it in a HTML region:
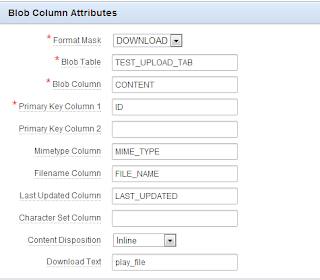
What’s also very interesting is, since <audio> is a native element, you can store your audio files as BLOB in the database. When you create a report on the table containing the BLOB files, you can set the download column to ‘inline’, and then you can start playing a file in your browser, straight from the database.

The downside is that your browser needs to support HTML5. If you’re not sure that your application is used only on HTML5 capable browsers, then you have to consider building your own media player. There are a number of media player plugins which are based on jQuery. One that stands out from the others is jPlayer.
JPlayer is actually a quite simple, yet very flexible plug in, written in jQuery. All you need to do is download the jPlayer library and make sure you have the jQueryUI library as well. Once you've loaded them to your file directory you can start building your own media player. For a very basic setup, you can simply create an html region and put the following code in the Region Source:
This will create the buttons for your media player. Well, maybe not the buttons, but we’ll make the list items appear as buttons later on with CSS. First let’s make our html region a player by adding some JavaScript. You can put the following code in your JavaScript file, or put it in your Region Source before the HTML. Make sure to put <script> tags around the code if you put it in your region definition:
Replace "#APP_IMAGES#Spinal Tap - The Sun Never Sweats.mp3" with your own song of choice that you’ve uploaded to your images directory. At this point your media player should be working, so now it’s time to make it look like a player as well. If you’ve not yet uploaded the CSS file from the jPlayer, now is the time. Upload it to CSS folder and make sure to place the accompanying images in the same folder as well. The images are used to show the play/pause and other buttons. If you prefer to keep your images in a separate image folder, you should edit the CSS file and edit the links to the images. If you’ve uploaded the CSS file last thing you need to do is include the file in your page by adding a link in your page html header:
Your audio player is set now. You can further customize anyway you like using CSS, jQueryUI and jPlayer functions and attributes. Now if you want to display a video in your application you can modify the audio player we’ve made, following the jPlayer guidelines. But take in consideration that video files can take up a lot of storage space (a particular problem if you use a workspace of limited size). Another way to include a video in your application is to embed it. You can upload your video to YouTube, Vimeo, or wherever you like. For here I’ll use a YouTube video.
To embed a YouTube video, choose your favourite video on YouTube and right click the player. From the menu choose the option “copy embed code”.
This code goes somewhere on your applications page, for example in the region source of an html region and you’re ready.
If you want to watch a working demo of the discussed media players, please visit my demo application.
- For further documentation on HTML5 elements see http://www.w3schools.com/html/html5_intro.asp
- For further documentation on jPlayer, check the developer guide
- For further documentation on jQueryUI visit the jQuery website
No comments:
Post a Comment